
Before You Begin: Essential Prep & Intel for Slab-Built Mugs
Before you start rolling out clay or cutting with a template, there are a few foundational steps that will make your slab-building process smoother and more enjoyable.
This guide covers everything you need to know before getting started: printing your templates, handling clay shrinkage, mixing a reliable magic slip, and managing clay moisture.
Think of this as the prep stage before you dive into the step-by-step mug tutorial — getting these details right will save you time and frustration once you start building.
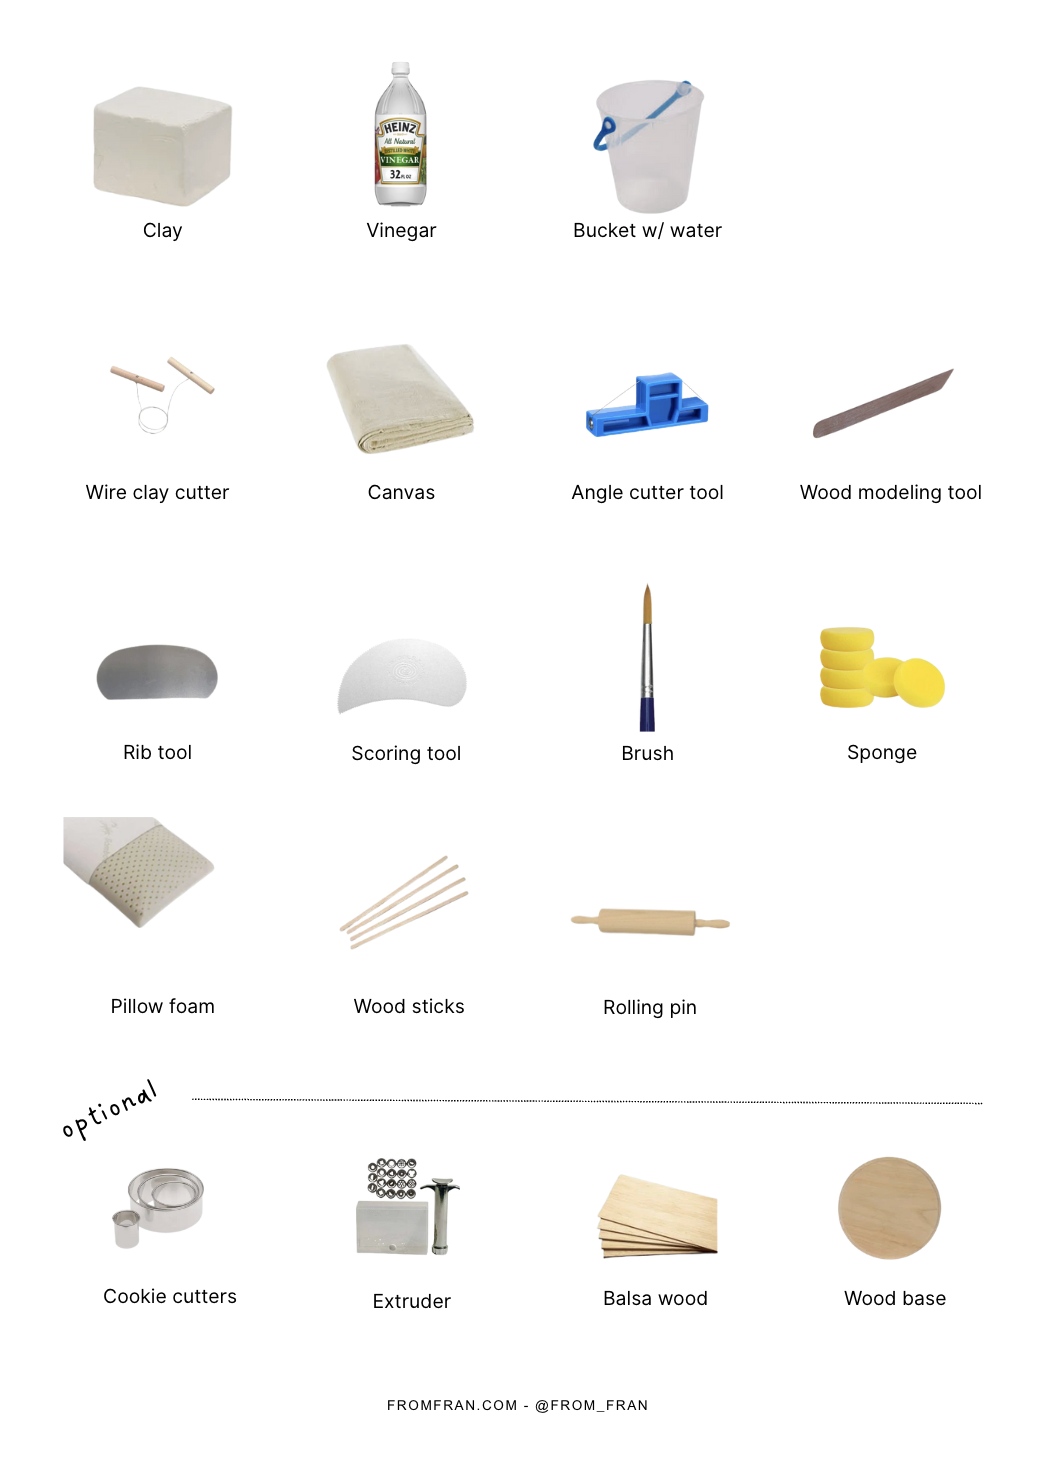
Materials and tools you’ll need
Printing Guidelines
Your templates will print true to size if you follow these tips:
Print at 100% scale (don’t “fit to page”).
Use high-quality paper for sharper edges.
For durability, laminate the templates or trace them onto balsa wood.
Cookie cutters also make cutting bases and handles easier — I highly recommend investing in a set.
Clay Shrinkage & Scaling
Different clay bodies shrink at different rates (typically 10–15%). This matters when you want your finished mug to match the size you’re aiming for.
👉 Use the Pottery Template Shrinkage Calculator to adjust your template size based on your clay body.
Magic Slip Recipe
When you’re joining pieces or repairing small cracks, regular slip isn’t always strong enough. That’s where magic slip comes in.
Mix vinegar, water, and clay dust until it forms a creamy consistency.
This slip works like glue and is especially helpful for fixing hairline cracks.
Clay Moisture Tips
Clay that’s too wet can be difficult to work with. If your slab feels sticky:
Lay it on canvas for a few minutes to let excess moisture absorb.
Be careful not to let it dry too much — you still want it workable and flexible.
Assembly Order to Remember
When you’re ready to build, always follow this sequence:
Form the Body
Add the Base
Attach the Handle
This order works for all of my mug designs — from simple espresso cups to larger latte mugs.
Ready to Start?
Now that you’ve got your intel and prep handled, you’re ready to move on to the fun part: building!
👉 Head to the Step-by-Step Slab-Built Mug Tutorial to follow the full process.
And if you’re ready to create your own mugs at home, grab the printable pottery templates I use every day in my studio. They’re modular, easy to print, and designed to make mug-building simple and repeatable.