
3 Ways to Add Color to Clay: Tint, Sgraffito, and Glaze

When it comes to decorating clay, there is more than one way to bring your ideas to life. Some artists paint on the surface, others build color directly into the body of the clay. In this post, I will walk you through three of my favorite techniques: tinting clay, sgraffito with slip, and glaze drawing.
1. Tinting Your Clay
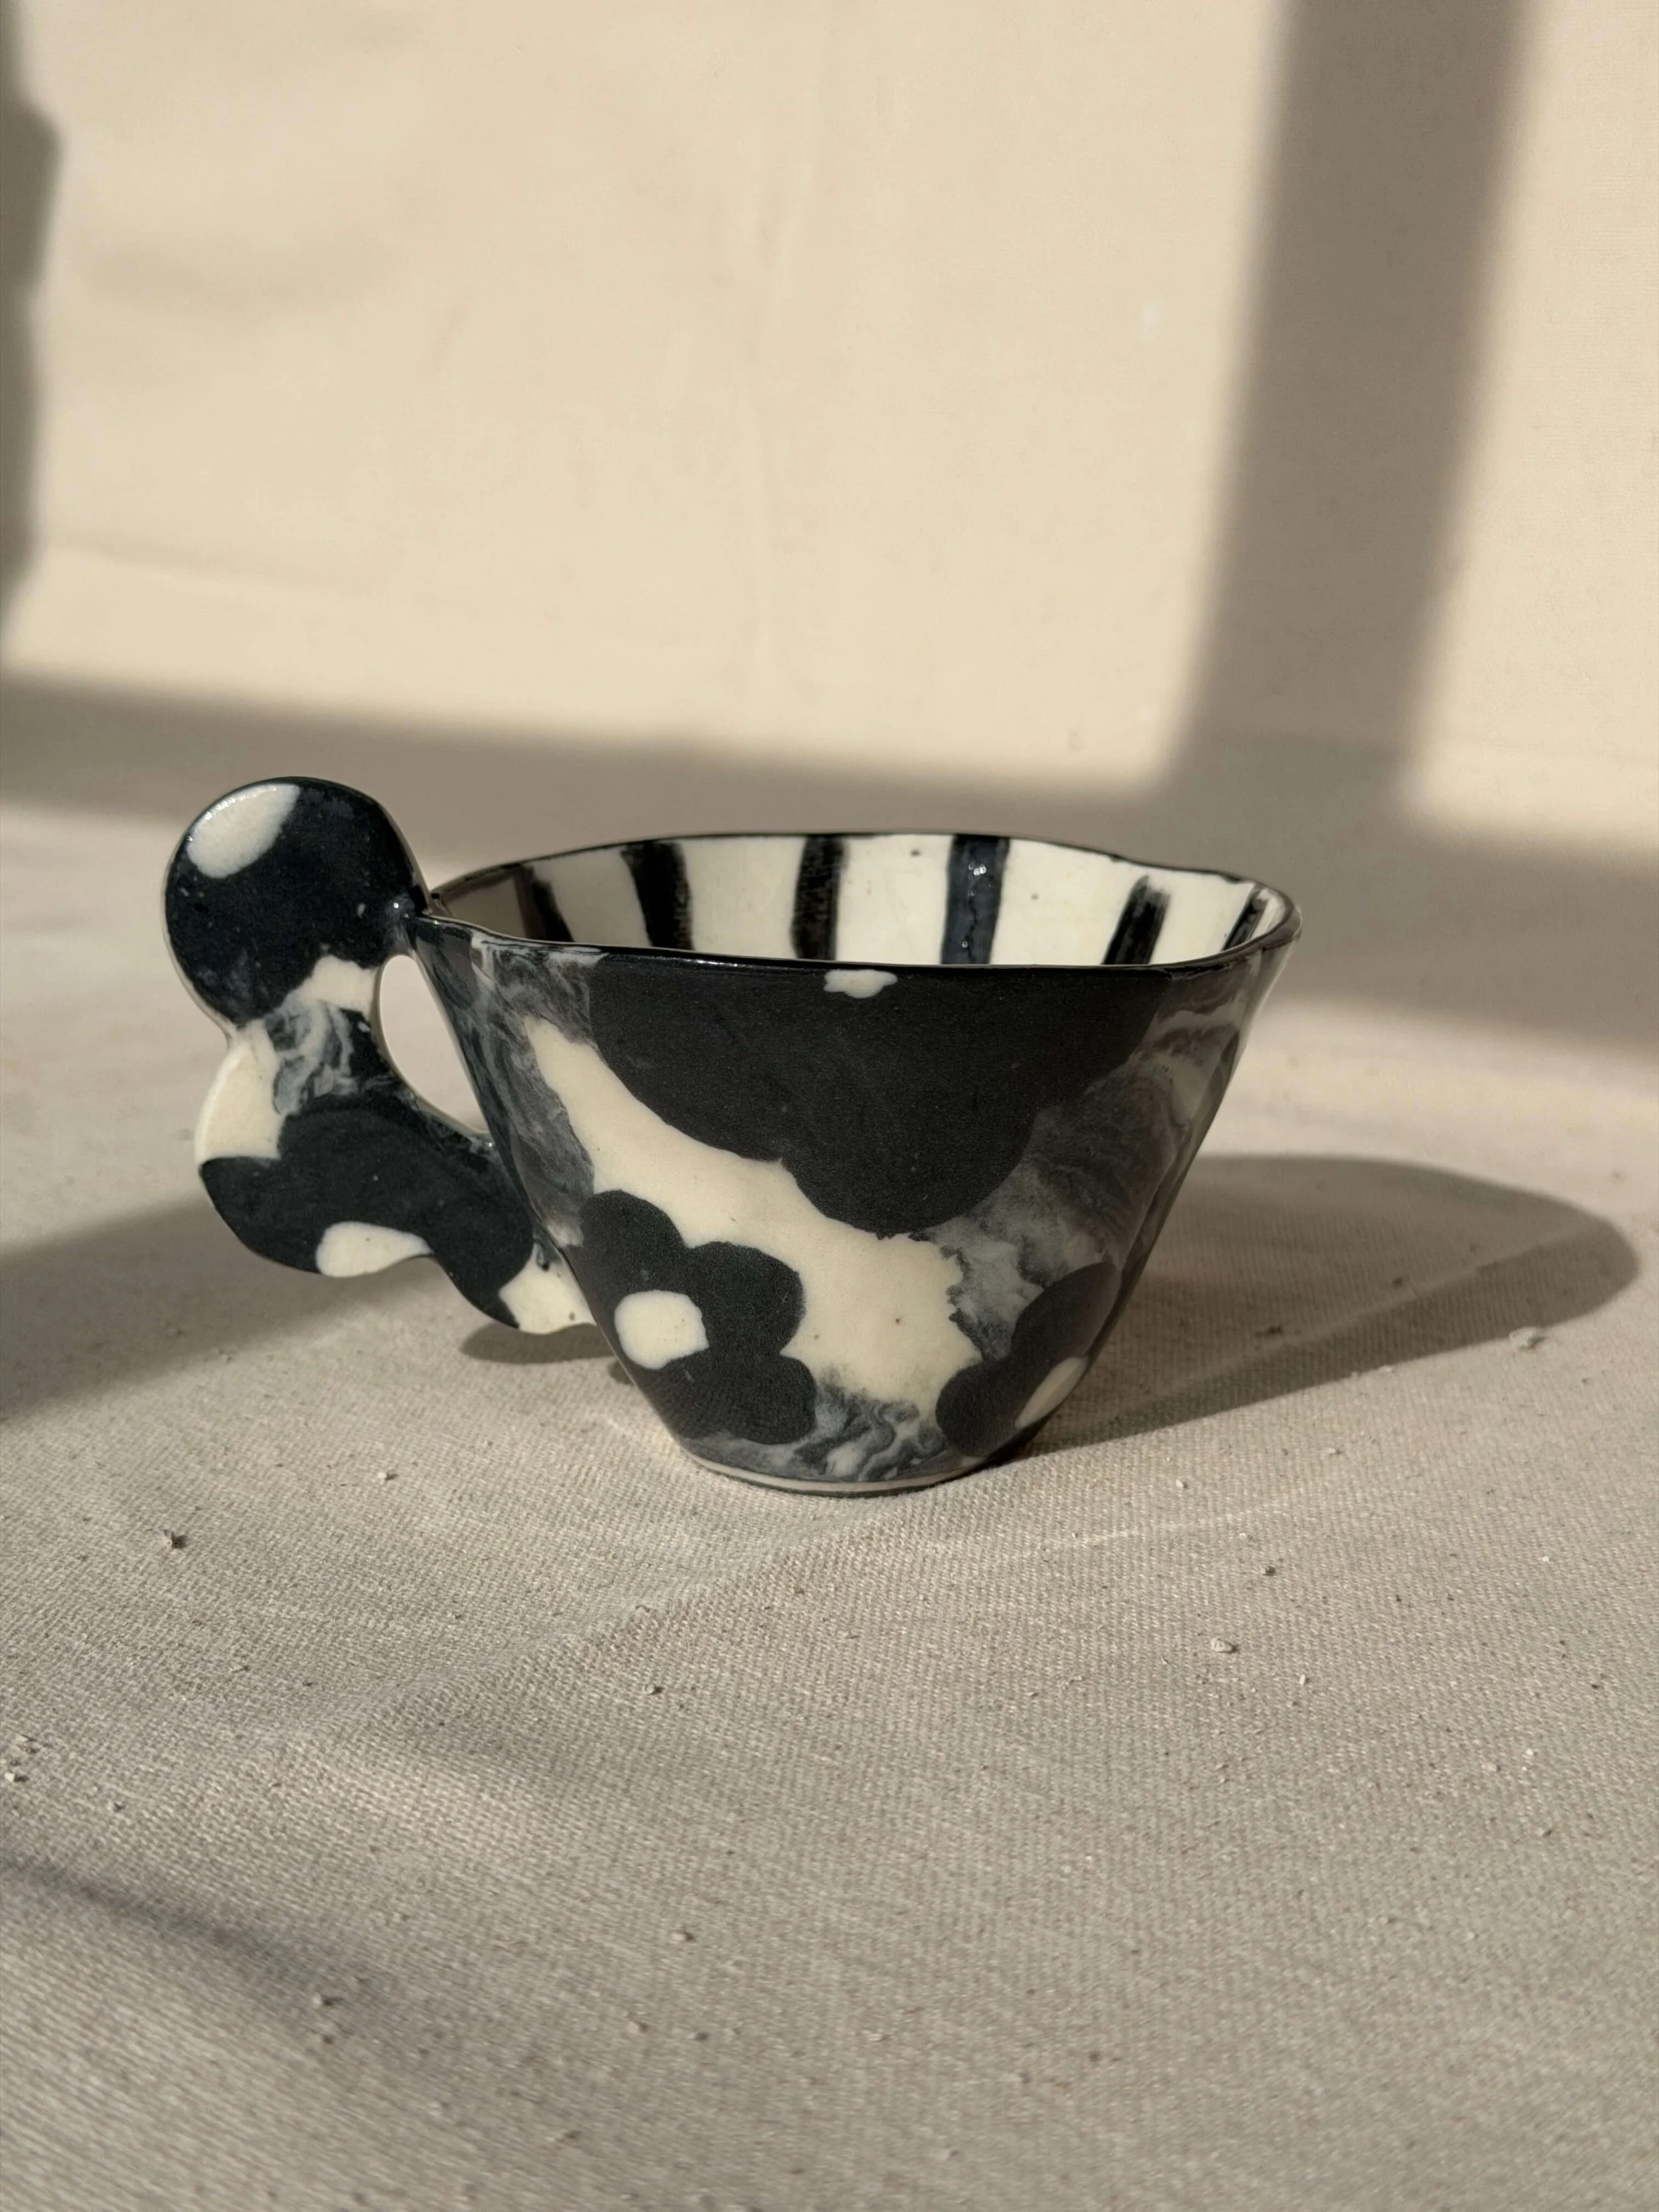
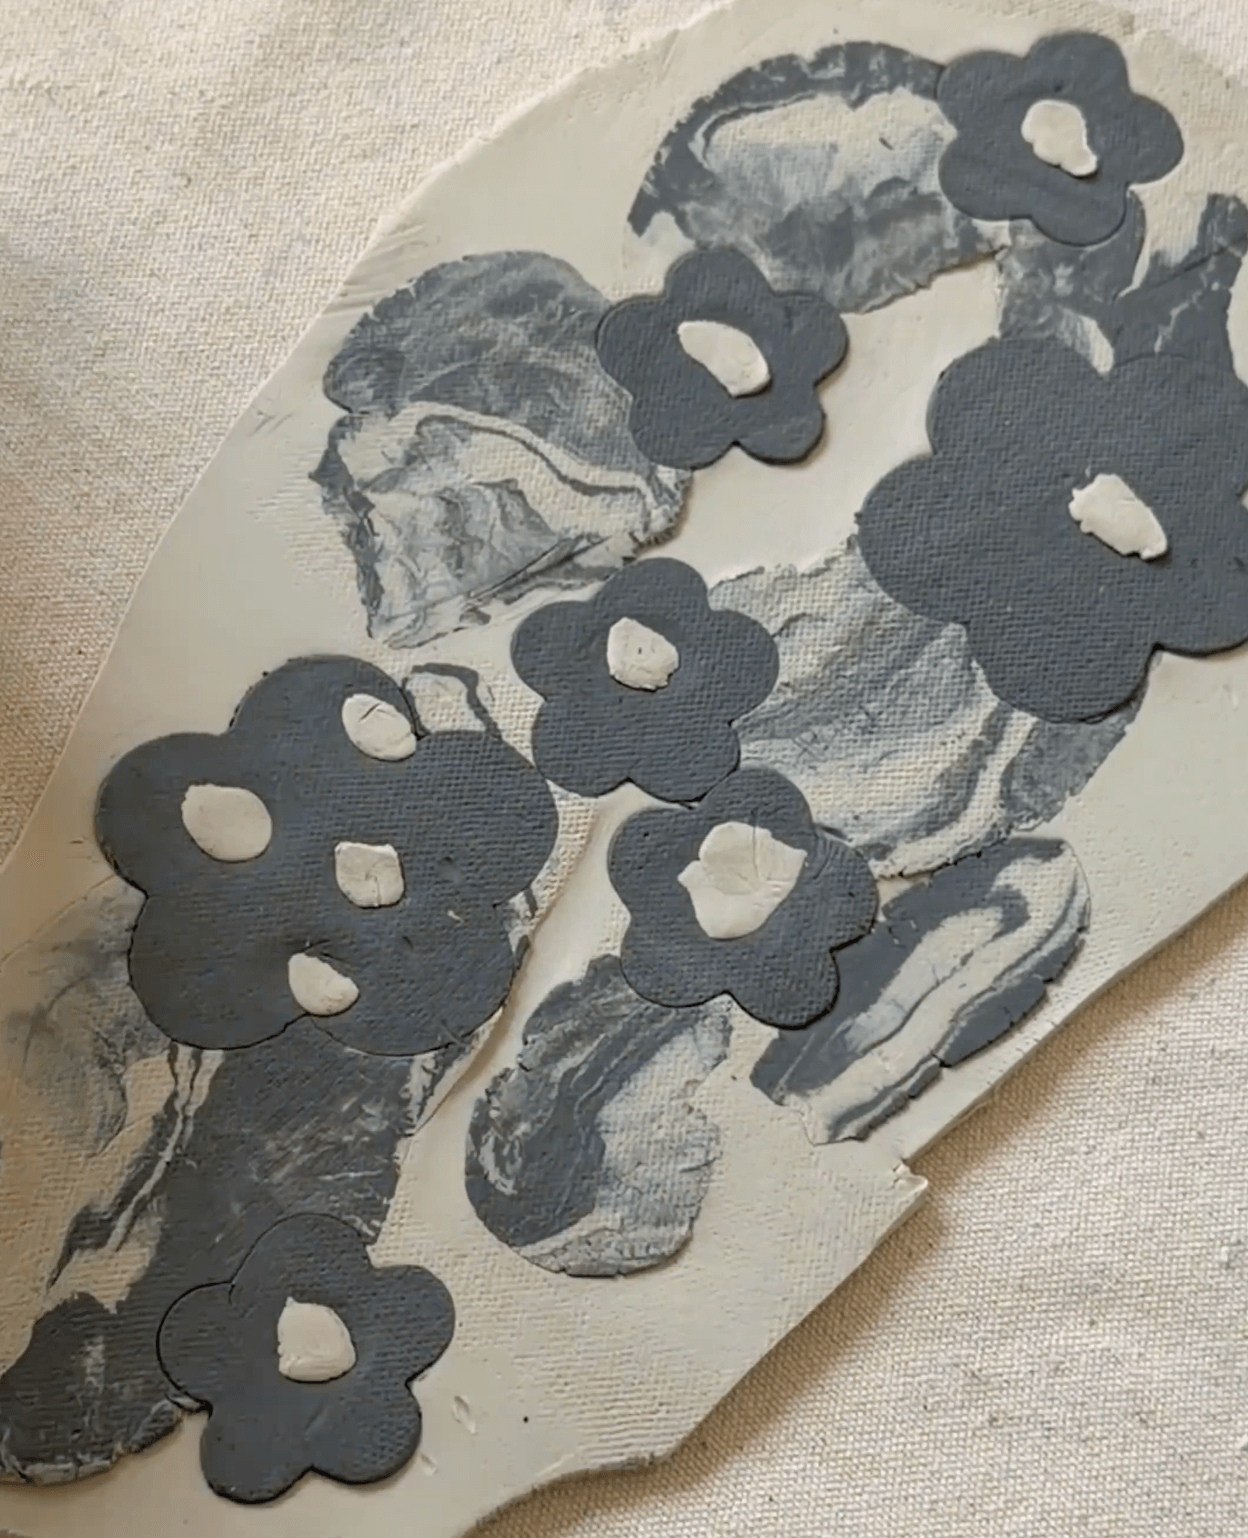
Tinting clay means coloring the clay body itself instead of adding color on top. This makes the color part of the structure so you can work with layers, marbled effects, and depth of color.
What You Need
Porcelain or white stoneware clay
Mason stains or ceramic oxides
Scale or measuring spoons
Mixing water and a clean surface
Rolling pin or slab roller
How to Do It
Weigh your clay and stain
Mix the color into the clay
Knead your clay until the color is uniform
Note: If you want to learn more about tinting clay, I have a full step-by-step guide in my shop — it covers color ratios, mixing, and how to keep your tones consistent across batches.
I also have a YouTube video and a blog post with more tips and details if you want to explore the technique a bit more.
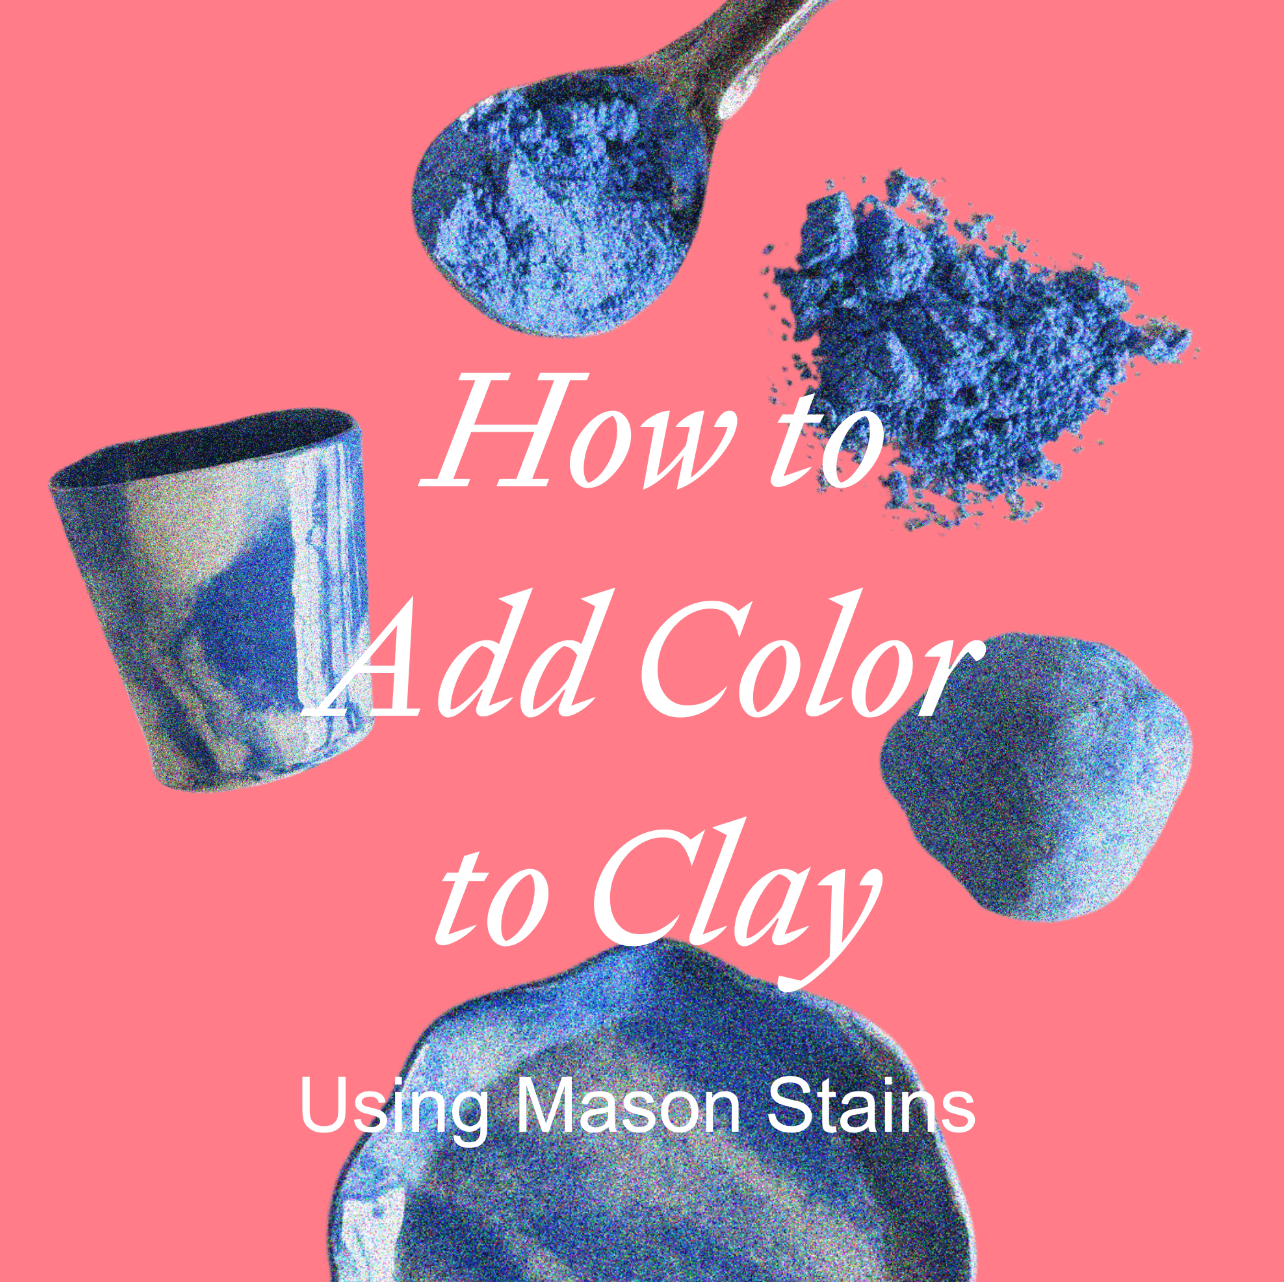
Transform your pottery with beautiful, consistent colors! This comprehensive guide teaches you everything you need to know about coloring clay with Mason Stains.
What's Included:
Step-by-step photo instructions for mixing colored clay
Pigment ratios for color intensity
Interactive online calculator for perfect measurements
Visual materials list with recommendations
Essential glazing guidance for optimal results
Perfect for beginners and experienced ceramicists! Learn how to create stunning vibrant solid colors and consistent results every time. This color intensity guide helps you achieve everything from subtle pastels to bold, saturated hues.
Download today and discover how easy it is to add professional-quality color to your handmade pottery creations using Mason Stains
2. Sgraffito Using Slip
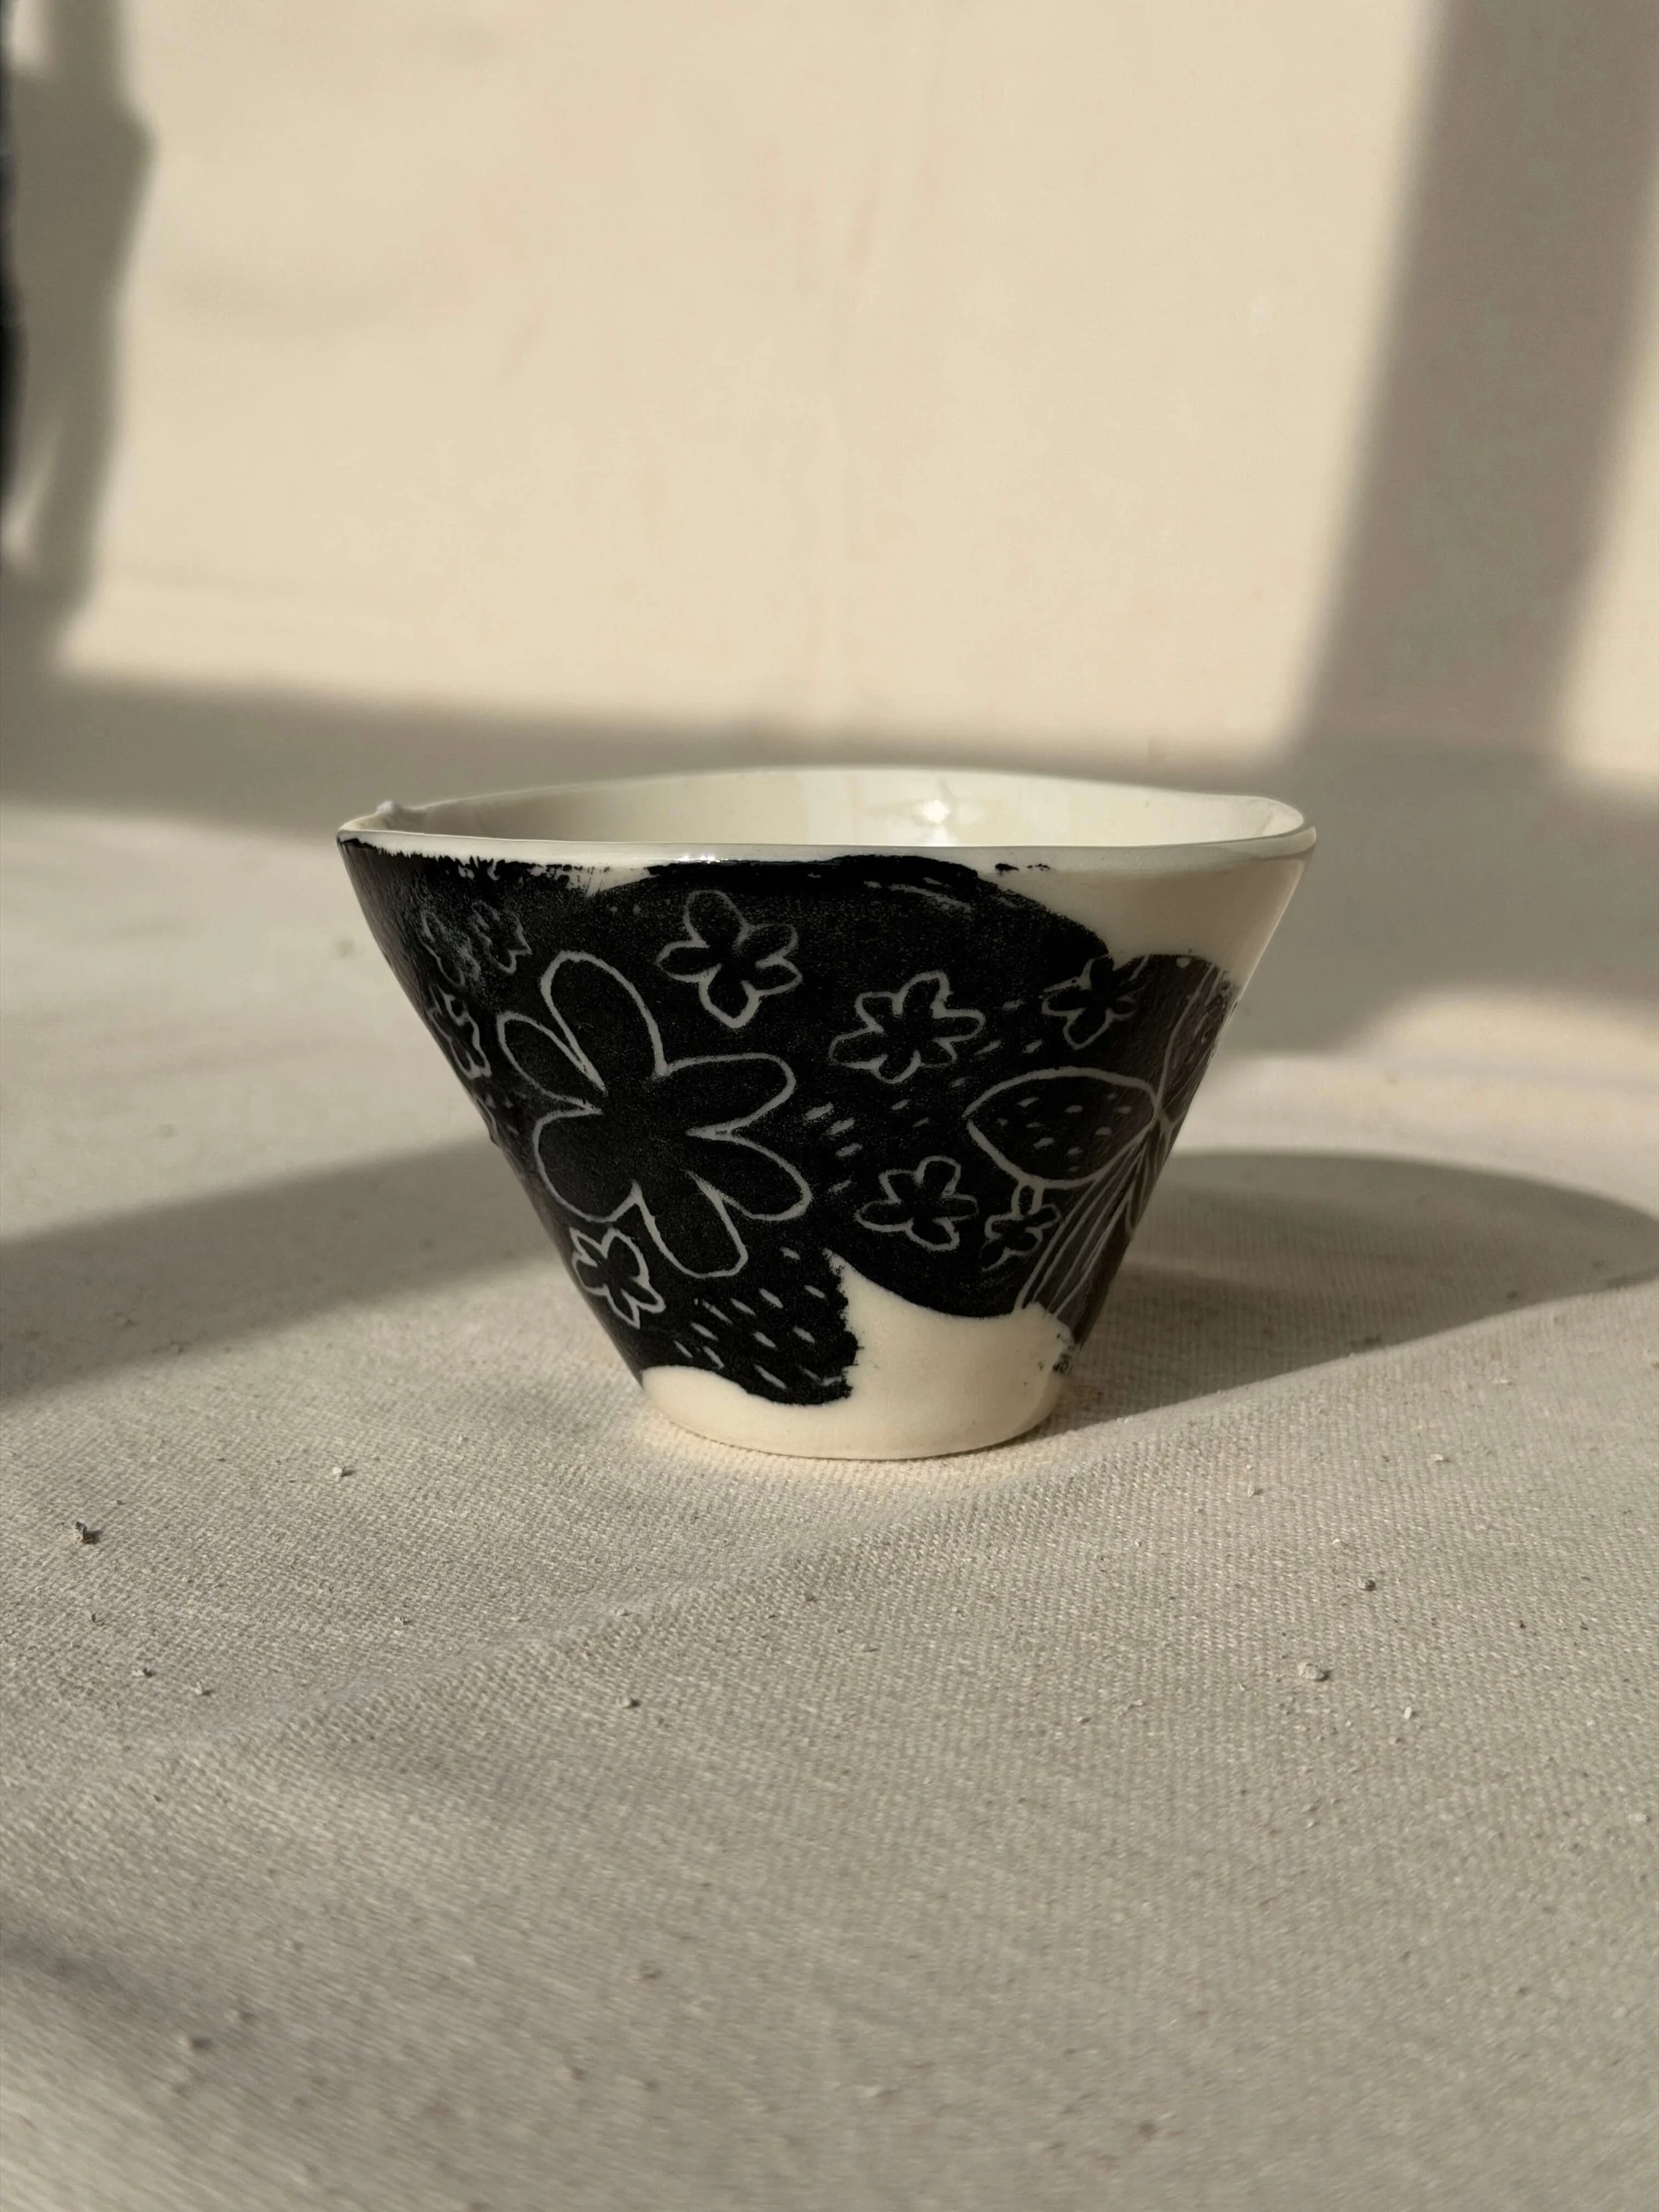
Sgraffito comes from the Italian word for “to scratch.” It is the process of carving through a contrasting surface layer to reveal the clay beneath. This technique is expressive and great for drawing on clay.
What You Need
Leather-hard clay piece
Slip in a contrasting color
Brushes or sponges
Stylus, loop tool, or needle tool

Step by Step
Apply slip. Brush or sponge a thin and even coat of slip on the leather-hard piece.
Let it set. Wait until the sheen disappears. It should feel damp but not sticky.
Carve your design. Use your tools to scratch away the slip and expose the clay beneath.
A stylus gives delicate lines.
A loop tool makes thicker, graphic shapes.
A stiff brush can add texture before carving.
Clean up. Gently brush away loose slip. I use a dry brush to do this.
Dry and bisque fire
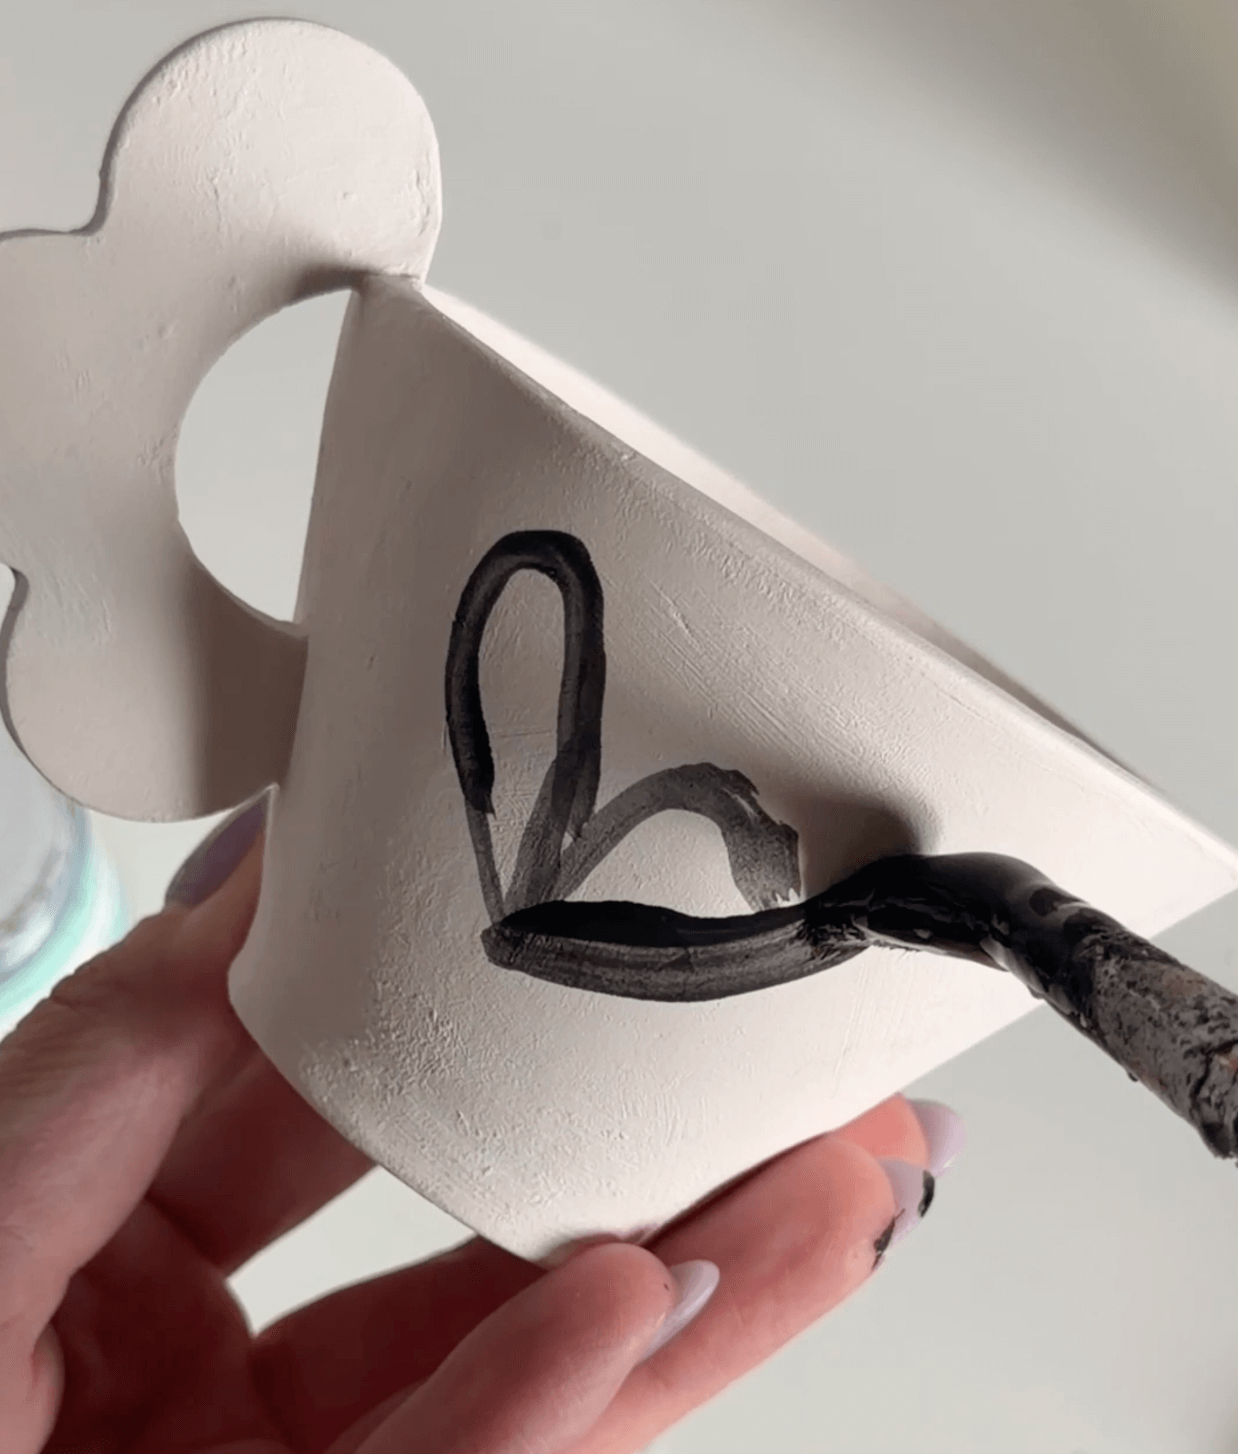
3. Glaze Drawing
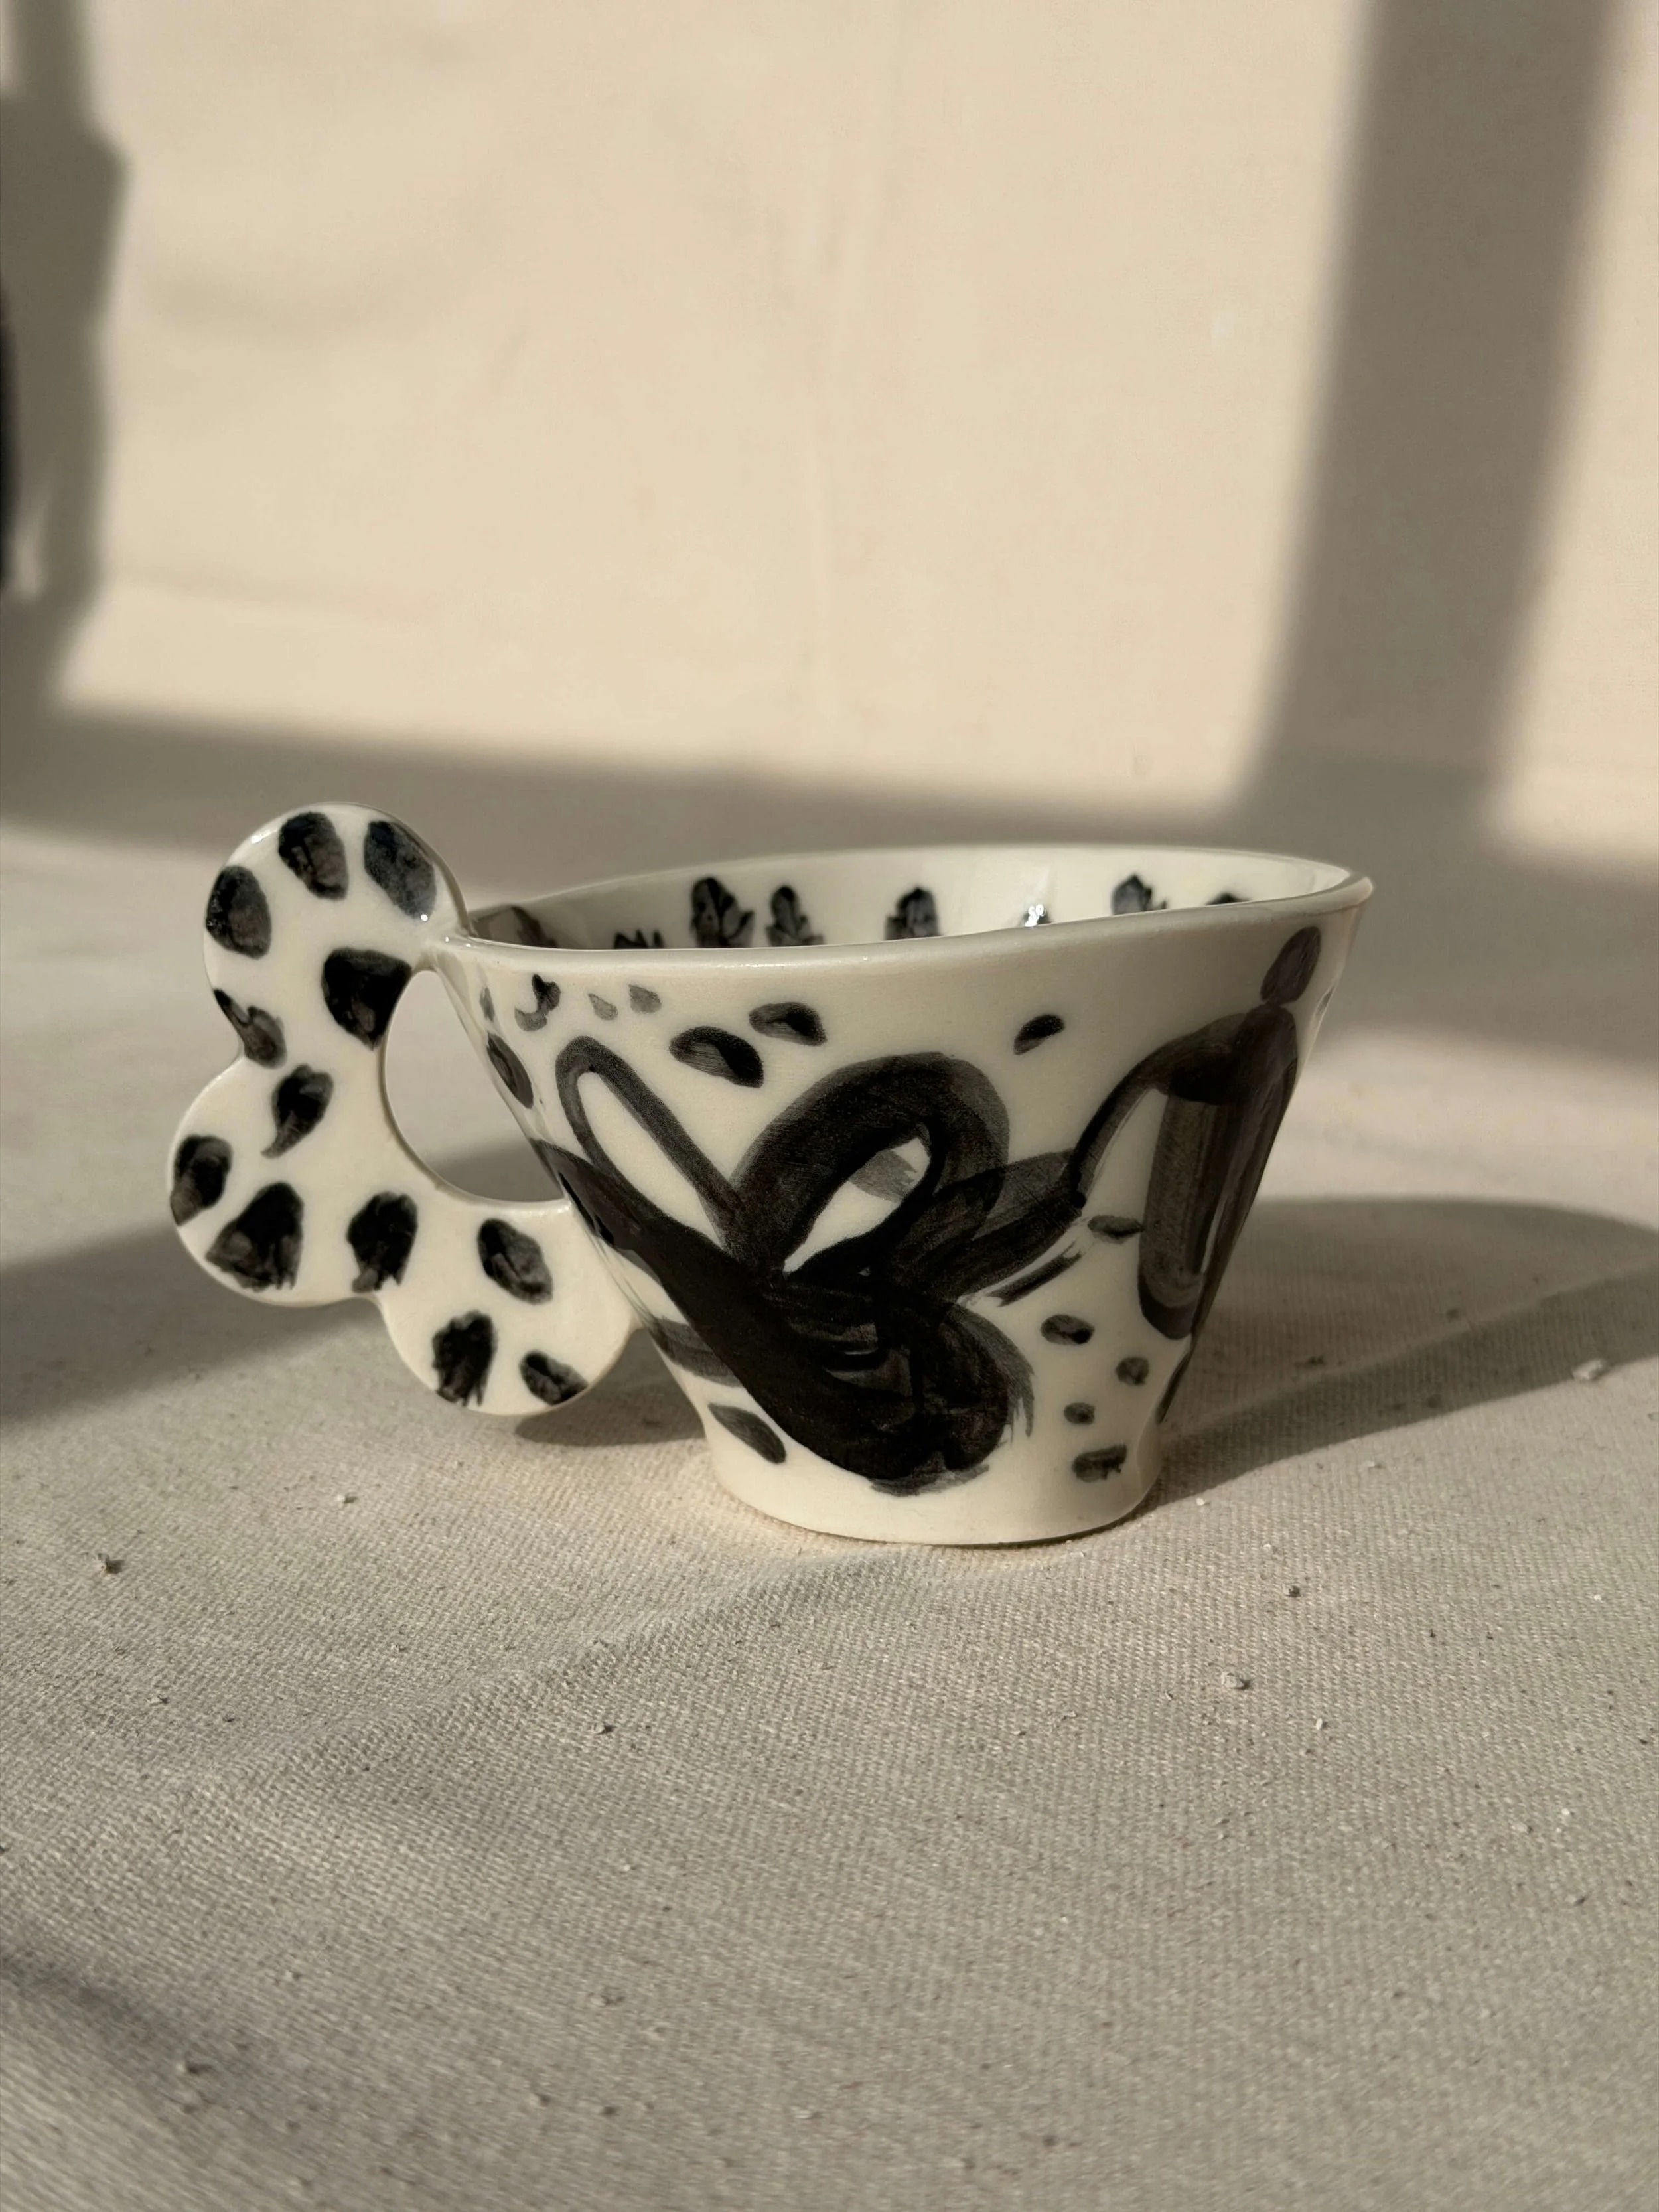
Glazes can also be used as a drawing medium. This method works especially well with underglazes because they behave more like paint or ink.
What You Need
Bisque-fired pottery
Underglaze (I use Amaco Velvet Underglaze Black, which fires safely up to cone 6)
Brushes
Clear glaze for dipping or brushing
Wax resist for the base
Step by Step
Prepare the surface. Wipe the bisque with a damp sponge to remove dust.
Draw or paint. Use underglaze like ink and build your design with brushstrokes or dots.
Let it dry. Wait until it is completely dry before applying clear glaze.
Apply wax resist. Cover the base so it stays clean.
Glaze. Dip your piece in clear glaze or brush on three even coats.
Fire to cone 6.
After firing, the surface will have a smooth and glossy finish with visible brushwork and depth.
Finishing and Firing
All three techniques can be finished with a clear glaze. Whether you are revealing color from within, carving it out, or painting on top, the final glaze firing brings everything together.
Check clay and glaze compatibility before deciding your colors and clay.
Each technique gives you a different way to express your ideas. Try them one by one, or mix them across several pieces to see how they interact. The possibilities are endless, and each piece will tell its own story.
Think of clay as your canvas or blank page.

Create your own flower-shaped cup and matching saucer with this printable slab-building template. The cup holds around 8 oz (240 ml), and the saucer doubles as a sweet flower plate for cookies, fruit, or display.
This digital download includes the printable templates and a step-by-step PDF guide with clay tips, assembly instructions, drying guidance, and links to video demos. Print at home on A4 or Letter paper, cut the pieces, and start building.
Includes:
• Flower cup template (body, base, handle)
• Flower saucer / flower plate template
• Step-by-step PDF guide
• Works great with clay that shrinks 10–13%
Perfect for beginners and experienced potters who love playful forms and soft-slab ceramics.
Digital download only.
More Resources
Watch my process on Instagram @from_fran
Questions? Comment below or send me an email fran@fromfran.com